Mar 21, 2017
Discussion:
Now that you have downloaded and set preferences, you need to become familiar with the Arduino Integrated Development Environment, or IDE for short. It works just like a text editor program.
I'm only going to cover what I think is important for us to know right now. We do a deeper dive on an as needed basis as we progress through the course. Specifically, in this lesson we'll cover:
- Selecting an Arduino Board and Serial Port
- Saving an Arduino File
- The Editor, Message Area, and Console
- A Few Other “Good to Know” Items
So let's open the Arduino Integrated Development Environment (IDE) and get started. Do this by clicking the Arduino icon.
Which Board and Serial Port Should I Use?
The first thing we're going to discuss is selecting the correct board. We have to let the Integrated Development Environment know what Arduino board you're using.
Go to the “Tools” tab, and then go down to where it says “Board”. You'll notice I selected the Arduino Uno since that is what I will use throughout the course.
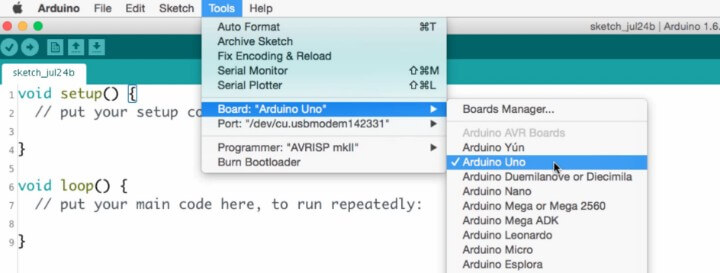
I recommend that you use an Uno or an Uno derivative throughout the course, as well. This will standardize our work in these lessons.
Once you've selected the board, next you need to select your serial port. People can sometimes be intimidated by this technical term, but you don’t have to be.
Serial ports are just the different things connected to your computer. The easiest way to find out which of the ports listed is your Arduino is to first unplug the Arduino from the computer.
Go to the ports list under the “Tools” tab, and write down the names of these ports.
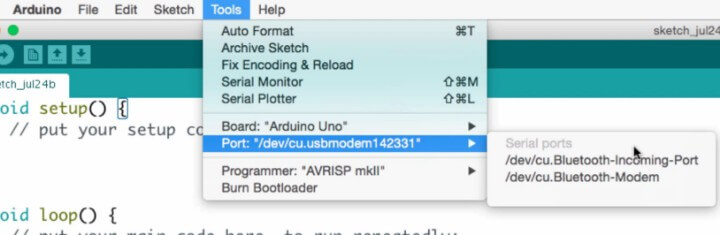
You only need to write enough to differentiate one from the next - maybe the last word or last few letters.
Then, close your Arduino IDE. Plug your Arduino board back in via the USB cable to your computer. Open the Arduino IDE.
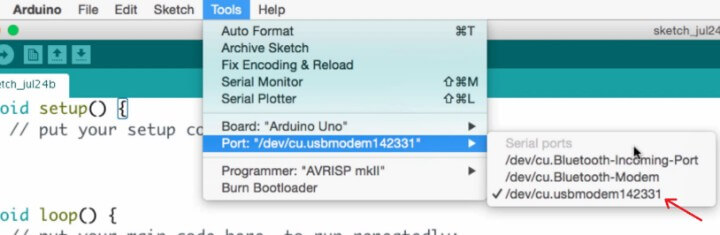
You should now be able to see an additional serial port not on the list you originally wrote down. That will be the serial port to which your Arduino is connected.
For Mac, you'll usually see cu or tty after the “dev/”. Those are the common ways Arduino will show up on the serial port for a Mac.
For a PC, it shows up as a COM port, but it's hard to know which one it will be. It could be one, two, four, etc.
That’s why the best method, although primitive, is just to unplug and plug the Arduino back into that port.
Once you’ve chosen the board and port the first time, these settings will stay the same for any subsequent times you reopen the Arduino IDE.
The reason I point this out is that if you happen to get a different board at some point, you will have to remember to change the board that is selected.
The Arduino File
When you open the Arduino IDE for the first time, it will open up a file for you, giving it a default name. That default is sketch, underscore, and the current date.
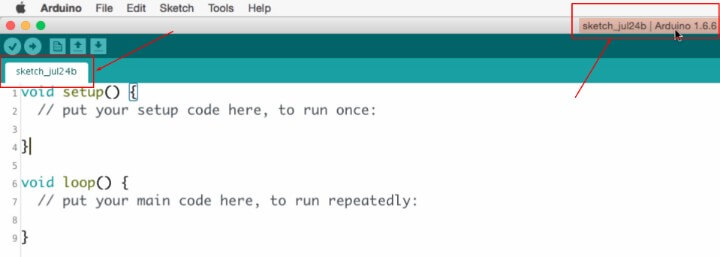
That name also appears at the top of the IDE, along with the version of Arduino you're using.
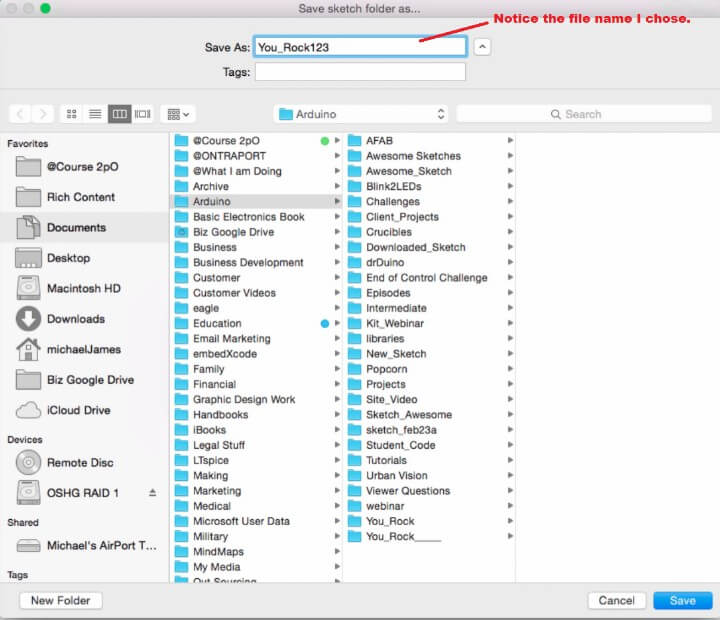
To save this, go to the “File” tab and then to “Save”. It's just like saving any other file. Notice it asks you to save the file in “Documents”.
Remember that in Arduino, files are referred to as sketches. So, the collection of our sketches is known as the sketchbook. The sketchbook folder is where all of the sketches we write will be saved.
Of course, you can also nest your files in that folder just like you could in any other program where you're saving files. It's really no different.
Take a look at the name I chose for my file. There are certain rules you must follow when choosing a name for your sketch.
When you're naming a file, you can't use any spaces between the words. One common method is to use an underscore where you would have normally preferred a space.
You can't use special characters, either. You can use numbers in the name, but you can't have a number as the first character. Lastly, the names are limited to 64 characters.
So, using these rules, name your sketch and save it.
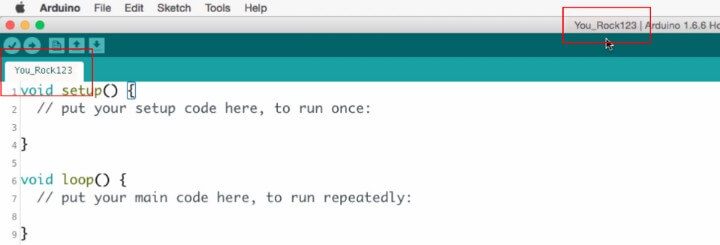
You'll see that the name on the tab and at the top of the screen now displays the name of your newly saved sketch.
So, saving is really easy. The shortcut command is Ctrl S. There is also a down arrow that you can click.
![]()
The Editor, Message Area, and Console
There are three main areas of the Integrated Development Environment: the editor, the message bar, and the console.
The editor is the big white space. It’s where you type the Arduino code.
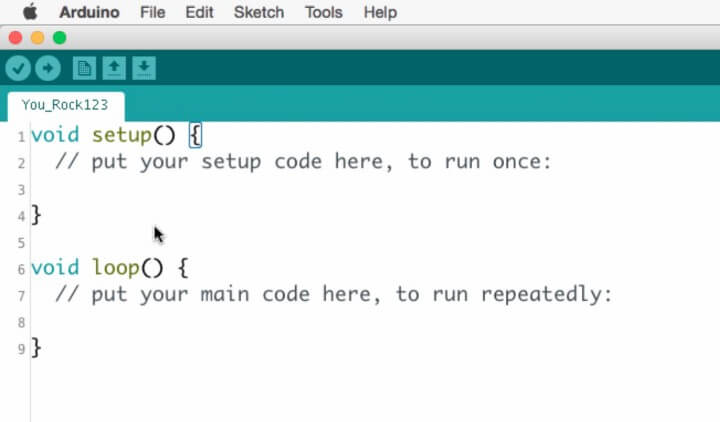
It has number lines down the side - as long as that was one of the preferences you checked from our last lesson on choosing your settings.
Right now it shows one through nine. If we were to add more code or move our cursor down further, it would adds numbers as lines are added.
I want to point out one thing in this name here. Do you see the little funky looking “s”?
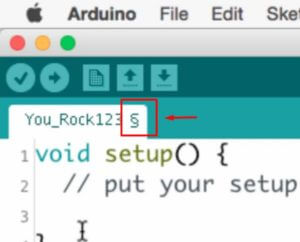
Every time you make a change to the sketch that has not been saved, that s will be displayed. If I save the file, it goes away.
If I were to type something in the sketch again, the funky little s would come back. It’s just a visual reminder to save your changes.
Personally, I am a save fanatic. For just about every single line of code I write, I use the shortcut key Control S to save before I go on to the next line.
I want to make sure I don't lose anything in the event that I have an issue with either the Arduino IDE, my computer, unexpected interruptions, or whatever might happen.
There is something interesting you might have noticed when you open a new sketch in Arduino. It auto-populates two of the mandatory functions for coding in Arduino.
This is why you see void setup an void loop. We'll talk about these in depth later, but it's perfectly normal for these to show up. It’s just a way of helping you save time when you code.
On top of the editor area are two very important buttons.
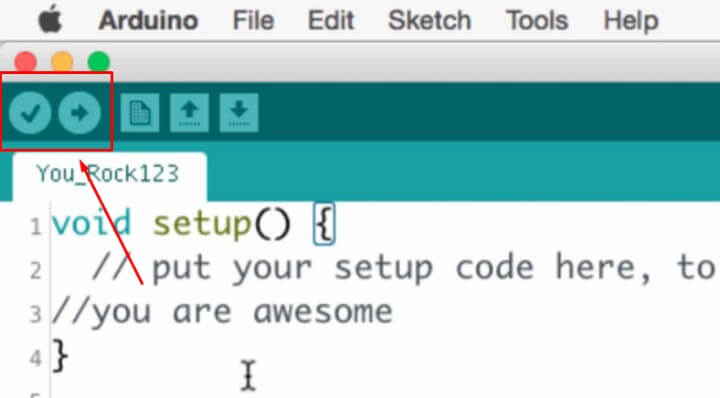
The first one is a check mark. It is the Verify button. When you click this, the code gets compiled.
Compiling, as discussed before, is taking the human readable code that we've written and translating it into machine code. As it compiles, the program will point out any errors found in that code.
It also does some optimization. This is a way behind the scenes concept that you don't have to worry about right now, though.
You constantly want to check for errors in your code. I like to verify my code at almost every line of code I write along the way.
The more you verify, the more quickly you can identify where you might have introduced an error into the code, i.e. find and fix a bug. We'll be using this verify button all the time.
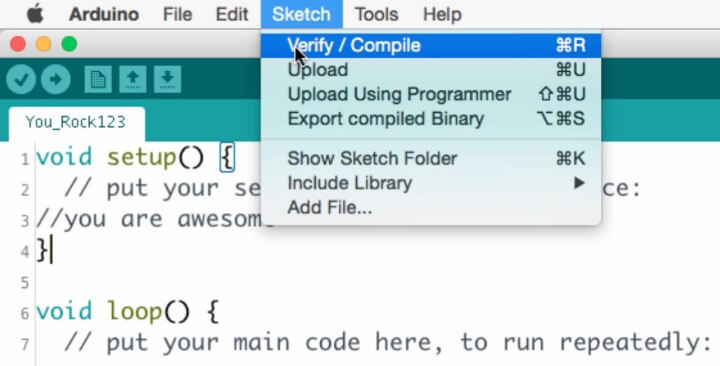
The shortcut key for verify is Command R or Control R. You can also verify by going to the “Sketch” tab.
That other button is the Upload button. That takes all of the code that we've written and uploads it to the Arduino board.
When you click that button and look at your Arduino board (assuming that it’s hooked up to your computer via the USB cable), you'll see two lights blinking rapidly. That is the TX and RX buttons.
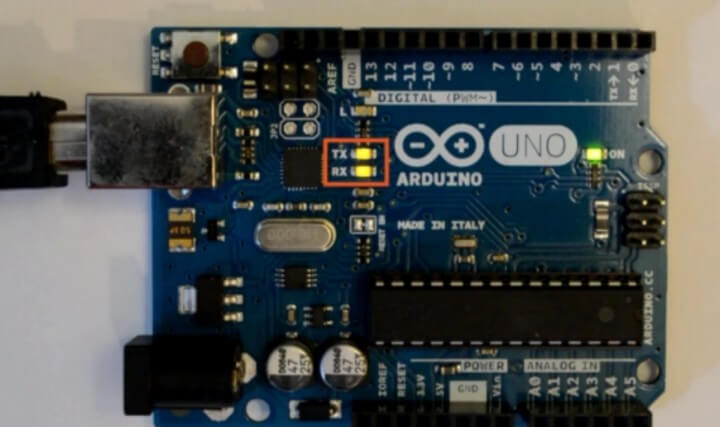
This is a good visual indicator that you have a good connection between the Arduino board and the computer. The IDE is recognizing that you have a board hooked up. In other words, the lights tell you that the code is successfully being uploaded to the board.
The shortcut key to upload is Control U or Command U. It is available in the dropdown under the “Sketch” tab, as well.
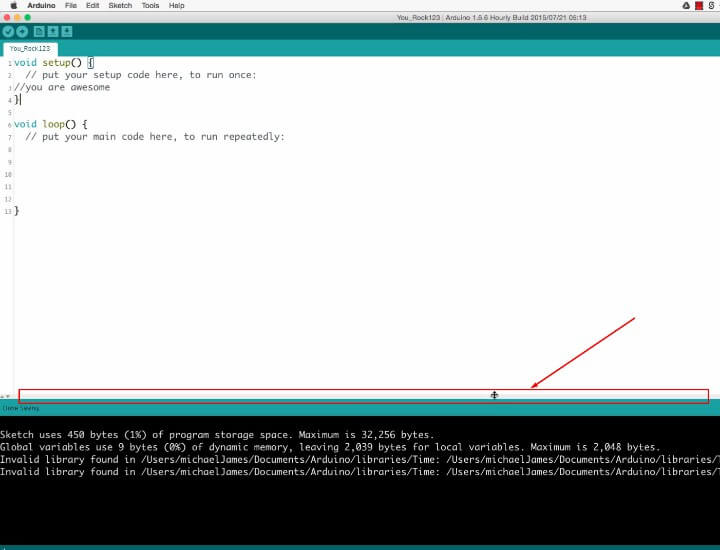
The second main area of the IDE is this blue bar. It is the message bar.
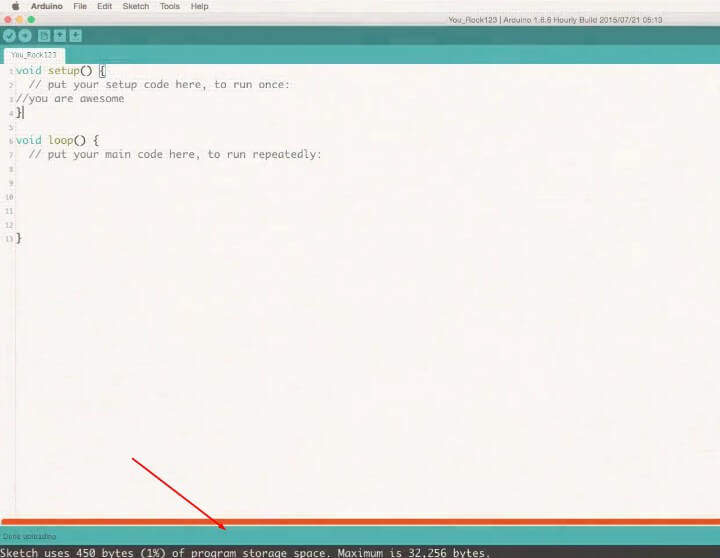
It will display information about what you've done recently in the program. For example, I just uploaded. You can see that it says, “Done Uploading.”
If I press Control S to save, it would say, “Done Saving.” There are other pertinent messages that display while you are using the program.
The third main area of the IDE is the black space below the message bar. It is called the Console.
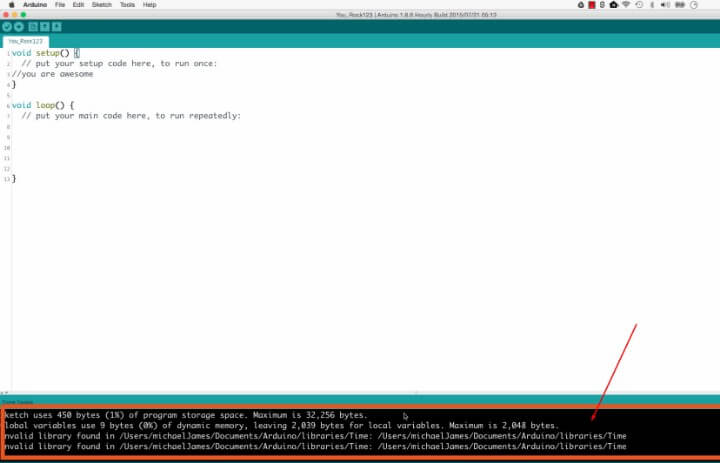
Now, you probably won't hear it referred to as the console very often. Many people just call it the error section, or some other generic term.
If you want to increase the console’s space, there is a bar you can drag up. It may be hard to see, so I put a box around it.
The console displays the error messages. It will tell you information about the current operation that you did.
For illustration purposes, let me introduce an error into the code and verify it. I’ll just type a crude, uncoded line somewhere in the editor area.

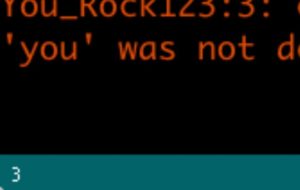
You can see that we get definitely get a reaction out of the Arduino IDE. First, the message bar gives us a quick note saying that you wasn’t declared.
Again, don't worry about understanding the error itself or any of the terminology displayed. I just want you to see where different types of information shows up.
Then, in the console much more detailed information about the error is displayed. It tells you what file it was in, what function it was in, and even the line of code. Here it says the error was in line three.
If we look back up at line three in the editor, we can see that it gets highlighted. That's where we can start looking for our error.
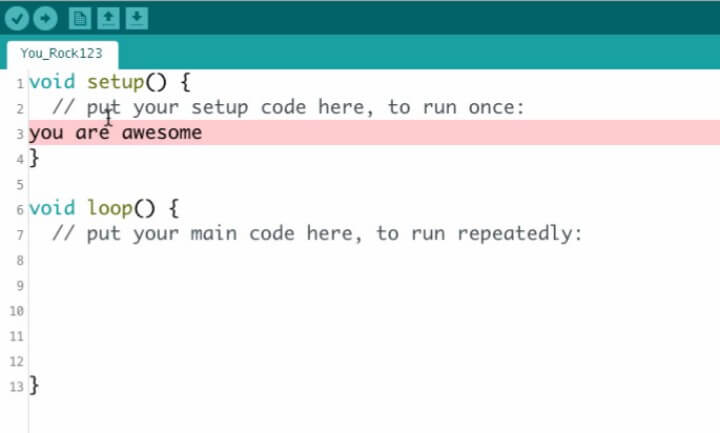
Unfortunately, it will not always point out the correct line of code for the error. You might have to do a little searching around, but that is a discussion for another time and another lesson.
You now know the three big pieces of the Arduino IDE. We walked through the editor, the message bar, and the console.
Miscellaneous Tidbits
There are a few final items we should discuss that are good to know. At the very bottom of the IDE is a number. Currently ours shows the number three.
That simply refers to the line of code where your cursor is located. It seems like such a small detail, but it is very handy.
Once you begin to work with larger and larger sketches, it may be harder to keep track of your cursor. This is especially true if you decide not to display line numbers down the side.
Also, in the far right corner you'll see some additional information.
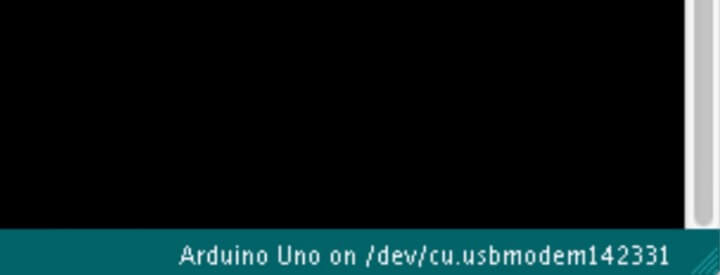
It is the name of the Arduino board and which serial port that you identified earlier that you’re using.
In the top right, there is a little magnifying glass. This is for the Serial Monitor.
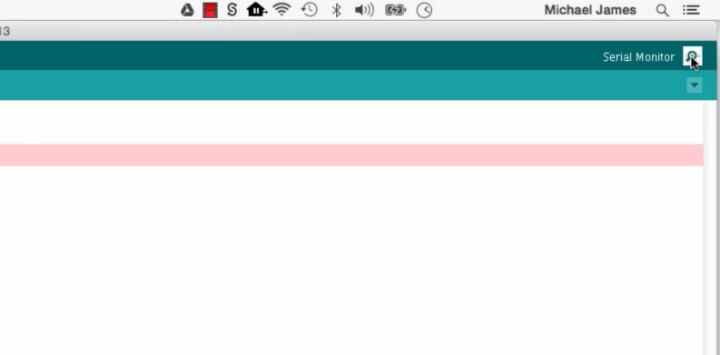
If you click it, a window like this opens:
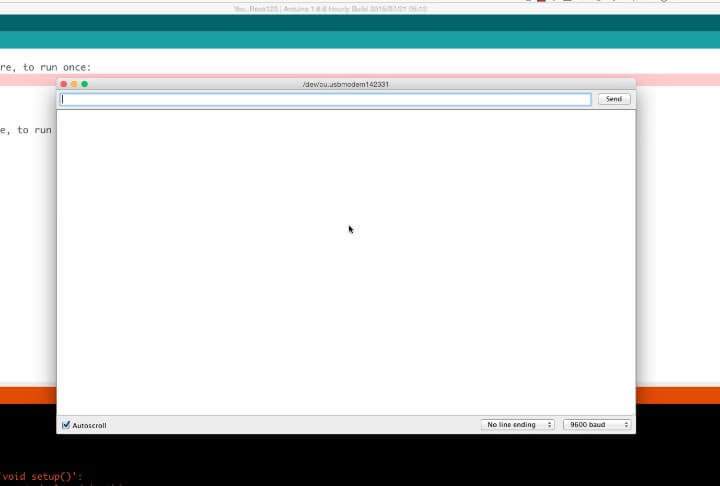
The Serial Monitor window allows us to see communication occurring between the Arduino and the computer, and vice versa. We'll have an entire lesson later down the road about the Serial Monitor and communications.
For now, just know that the button is there. The shortcut key for the Serial Monitor is Shift-Control(or Command)-M.
Now Get Going!
You now know enough information to start using the Arduino IDE. You can see it's not too complex. The IDE is very simple and streamlined.
Arduino was designed for ease of use. There's not a bunch of bells and whistles that can sometimes get in your way. I have no doubt you’ll be an Arduino pro in no time.